This post will show you how to set up SSH keys on your Raspberry Pi. Consider it as the very basic security configuration if you are exposing your Rpi to the Internet.
Other than that it’s also very convenient because you don’t exactly need to write your login password every time you are logging in to your Raspberry Pi.
This post is also part of miniseries on how to quickly set up fully functioning Foundry VTT on your Raspberry Pi.
This tutorial will show you how to switch from a basic username and password login to SSH keys powered login (using Windows tools).
Steps:
For starters, it is a good security habit to keep your Raspberry Pi up to date.
sudo apt update && sudo apt upgrade
And clean after yourself.
sudo apt autoremove && sudo apt autoclean
If you want to change your user password before any of this, it’s always a good idea to change your passwords once in a while.
passwd
Now the SSH keys part. A very basic understanding of this concept is that you will create or “generate” two keys that will tell your PC and your Raspberry Pi who is logging in, if it is you, and if you should be let in.
To achieve this we need to generate our new SSH KEY PAIR.
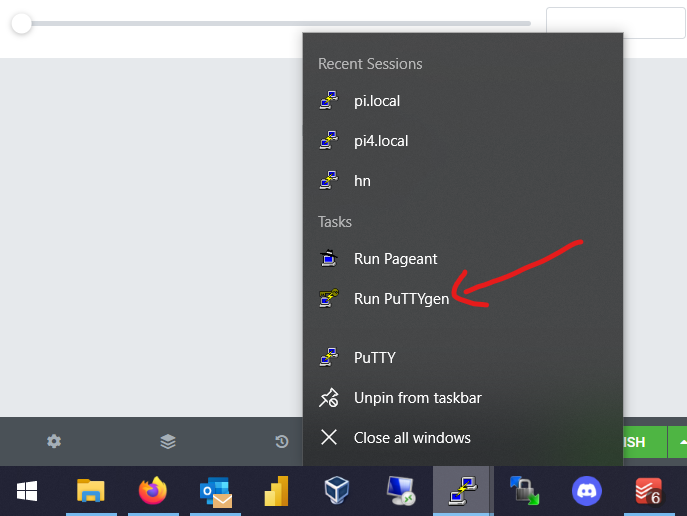
We can do this directly from Putty itself. Just right-click the Putty application on your bar a choose “Run PuttyGen”.
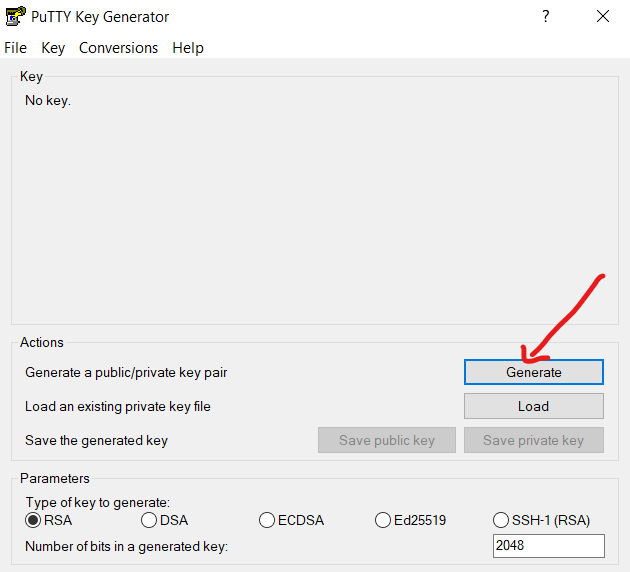
Default parameters are fine. Click “Generate” and move your mouse a little to give Putty some random input to calculate new ssh keys.
After the key pair is generated you need to Save these keys and keep them secure and private.
One of the keys is called the Public key – this is the key that will be sitting on Raspberry Pi.
The second one is called the Private key – this one we will keep on our PC, or on all computers from which we will want to connect to our Raspberry Pi in the future.
Save both the Public and Private keys.
You will be asked if you want to set up a password for the Private key. It’s not necessary but you can if you want to.
The copy text representation of Public Key to Raspberry Pi to a specific file that is called “authorized_keys” located in the home folder of your Raspberry Pi user.
On Raspberry Pi create directory with appropriate permissions with this command:
install -d -m 700 ~/.ssh
Create the authorized_keys file and paste the actual public key in it:
nano .ssh/authorized_keys
Save the file and exit the text editor.
Check if the file was created correctly:
ls -la ~/.ssh
Now how to connect to your Raspberry Pi with your SSH key via Putty.
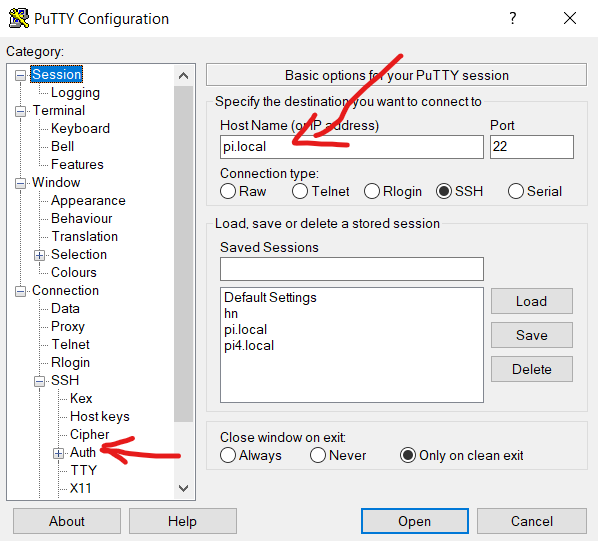
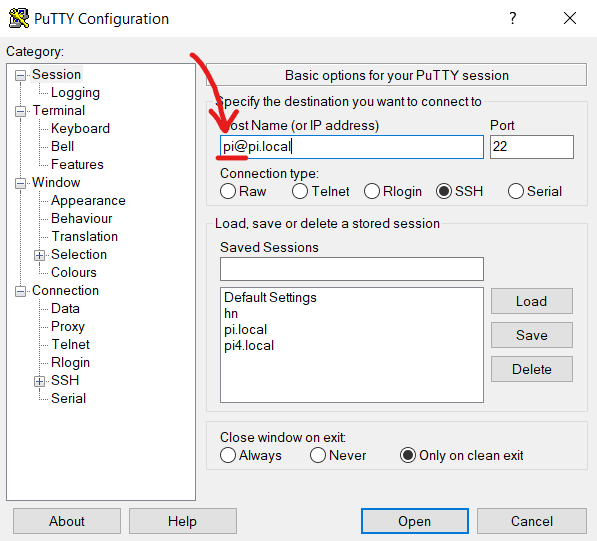
Open Putty a type in network address or IP address of your Raspberry pi.
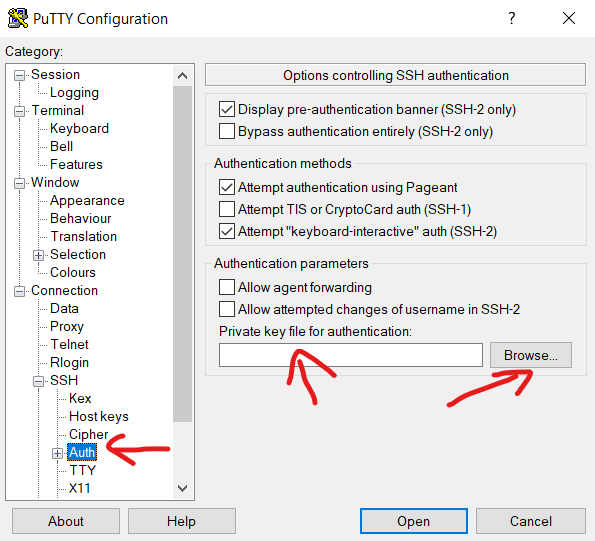
In the section “Connection” find the “Auth” subsection and Browse to find your Private key.
Hit open and you will be connecting to your Raspberry with the Private key you specified.
So that’s the first part. Now the part that makes your system more secure is forbidding everyone from logging into your pi via ssh with just a user and password. This will eliminate the threat of anyone trying to brute-force or guess the password of users on your pi.
To do this we need to edit file /etc/ssh/sshd_config
sudo nano /etc/ssh/sshd_config
Find the line named PasswordAuthentication, uncomment it, and set the value to no.
					# To disable tunneled clear text passwords, change to no here!
PasswordAuthentication no
#PermitEmptyPasswords no
Save the changes and reboot your Raspberry Pi.
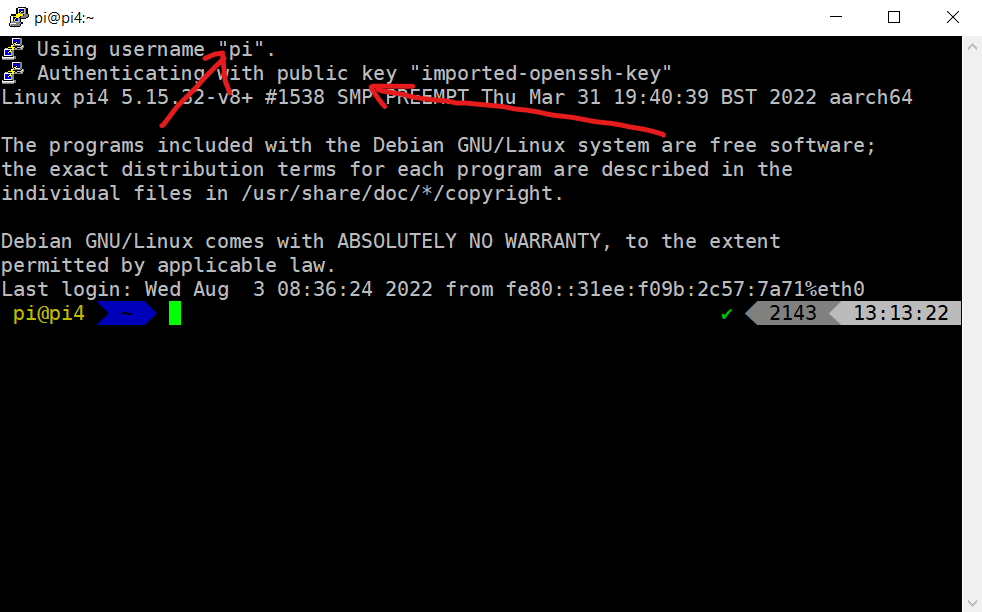
Log back in. This pi@ before the address says that you will be logging in as “pi” user, so you don’t need to type it every time you are logging in to your Raspberry Pi.
As you can see you are still able to connect to your Raspberry Pi with the key only.
But no one will be able to connect to it with just a username and password.
If this tutorial helped you in any way please do check out my YouTube channel.